
![[New] Leading Lights in the World of Game TikToks](https://www.lifewire.com/thmb/R3lz9sqjFIJ8bsy-_L1OGfmqrMI=/400x300/filters:no_upscale():max_bytes(150000):strip_icc()/tpmslightcomeson-59daaa4a68e1a20010dc0c97.jpg)
[New] Leading Lights in the World of Game TikToks
Leading Lights in the World of Game TikToks
Gaming has become one of the most popular leisure-time activities. According to research, there are more than two billion users worldwide. Now when such a large portion of the population is interested in something, there are bound to be interested groups everywhere.
So, just like every other social media platform, Tiktok has also become a hub for gamers. Gamers from anywhere in the world can make short videos for their audiences showing off their skills, providing tips and hacks, and much more.
So, let’s take a look at the top 10 gaming Tiktok accounts and what they have to offer.
10 Amazing Tiktok Gaming Accounts
Tiktok is apparently the new destination to reach gamers worldwide. Given below are 10 of the most amazing Tiktok gaming accounts that you can follow to stay up to date with the gaming world.
1. Gaming
Gaming by Gamelancer is the most popular TikTok gaming account. It has 9.1 million followers and 419.9 million likes. It is a business account that gives gamers all around the world information regarding gamelancers.

Figure 1: Minecraft Video shared by Gamelancer
This account helps gamers connect with people who can give them a revenue opportunity in return for their skills.
2. Gamingbible
Gamingbible is another gaming account with around 2.5 million followers and 58.7 million likes. This account posts various funny videos related to videos games and gamers.

Figure 2: A video of giving sidequests to strangers
3. Amongus
Amongus is a fun comedic game that has an account run by Victoria Tran. It has 2.9 million followers and 23.1 million likes.

Figure 3: Among Us on Xbox and Playstation
The user uploads fun videos for Among Us fans that can engage them in an interactive manner. She gives interesting information and lets the audience know about the updates.
4. Leslee Sullivant
Leslee Sullivant is a game developer who runs a Tiktok account with the name “famous_streamer .” She has 12.9k followers, relatively less but still enough.

Figure 4: Leslee Sullivant’s Video
She uses this account to accustom people to the video game industry and help the newcomers by giving them insights and tips. The best part about her account is that she discusses topics in a meme-like manner which makes it fun to watch.
5. KMZWIsolation
On this list, this is one of the most interesting accounts. KMZWIsolation is run by a Japanese man. He has 1.3 million followers and about 16.6 million likes.
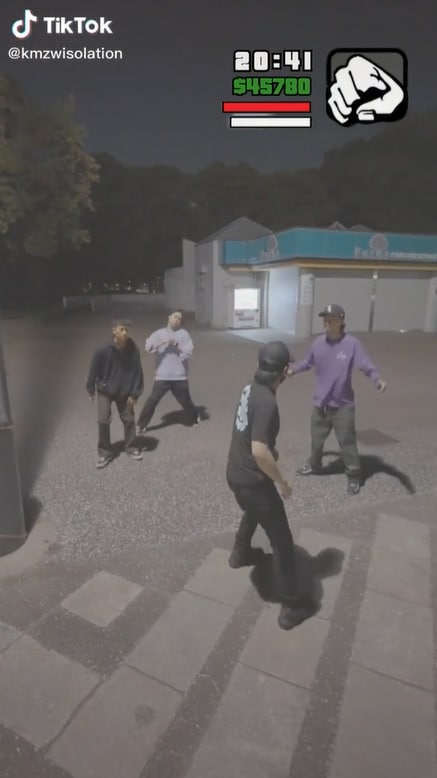
The unique thing about this account is that the user recreates games in the real world. For example, he would take a scene out of GTA V and explore how it works in the real world.
6. DKOldies
DKOldies is an online video game store. It will definitely appeal to you if you are a little older as it has a unique way of discussing video games in a nostalgic manner.

Figure 7: “Game Boy on the N64?” Video by DKOldies
Although the follower count of 630.6k doesn’t show it, this account has a lot of traffic. The proof of this is the 12 million likes.
7. Superlouis_64
Another good Tiktok gaming account is Superlouis_64 . This account embodies the tech side of Tiktok. The user uses different hardware such as swords or other items. He modifies them and does unbelievable feats with them.

The best part is that his content fits into the short video limit that Tiktok has.
8. Cozy.games
Cozy.games is another type of gaming account. It is not your run-of-the-mill account; it is pretty chill. It offers you warm and cozy game feels for you.
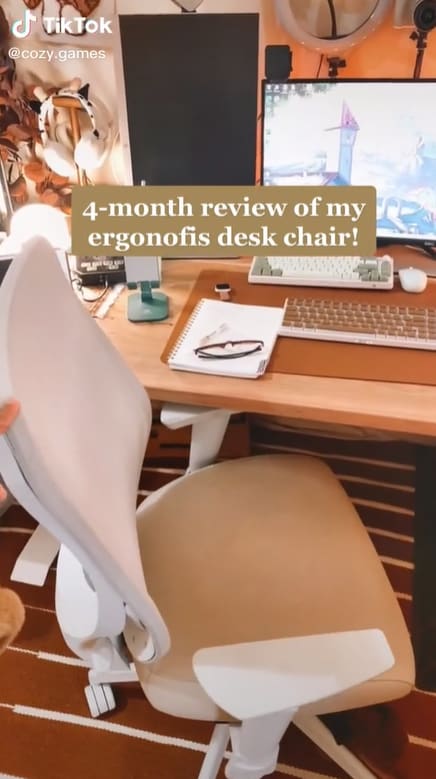
Figure 9: Ergonofis Desk Chair Review
If you’re looking for such a cozy environment in your gaming space, then this is the account you must follow. The user provides amazing aesthetics for your setup and also offers recommendations for chill games that you can play to escape the craziness of the world.
9. Roblox
How can we forget Roblox when talking about gaming? It is an amazing platform for users to interact with other developers. And obviously, such a platform must have a Tiktok account.
Roblox’s official Tiktok account has 7.8 million followers and 3.3 million likes. It is the place where people come together to play, create, and socialize.
10. Typical Gamer
Andre Rebelo, AKA TypicalGamer , is a Canadian gaming Youtuber known for his live streams of Fortnite. Having switched platforms in order to make short comedic skits and gaming challenges on TikTok, Typical Gaming is enjoying a relatively successful channel growth and audience engagement.

Figure 10: 2 Favorite Fortnite Moments
With his official gaming account numbering over 6.7 million likes and 1.6 million followers, Typical Gamer is your go-to getaway for enjoying quality gaming content that includes Fortnite, GTA, Spiderman, and many more.
Conclusion
Tiktok is an all-in-one platform that has everything to offer to its users. Gaming is pretty common, and gamers require different platforms to further their interests.
So, as with other interests, Tiktokers also provide a great opportunity to the gamer community with its different accounts. You can learn a little bit about everything from these accounts.
So go and start following these amazing accounts.
Figure 1: Minecraft Video shared by Gamelancer
This account helps gamers connect with people who can give them a revenue opportunity in return for their skills.
2. Gamingbible
Gamingbible is another gaming account with around 2.5 million followers and 58.7 million likes. This account posts various funny videos related to videos games and gamers.
Figure 2: A video of giving sidequests to strangers
3. Amongus
Amongus is a fun comedic game that has an account run by Victoria Tran. It has 2.9 million followers and 23.1 million likes.
Figure 3: Among Us on Xbox and Playstation
The user uploads fun videos for Among Us fans that can engage them in an interactive manner. She gives interesting information and lets the audience know about the updates.
4. Leslee Sullivant
Leslee Sullivant is a game developer who runs a Tiktok account with the name “famous_streamer .” She has 12.9k followers, relatively less but still enough.
Figure 4: Leslee Sullivant’s Video
She uses this account to accustom people to the video game industry and help the newcomers by giving them insights and tips. The best part about her account is that she discusses topics in a meme-like manner which makes it fun to watch.
5. KMZWIsolation
On this list, this is one of the most interesting accounts. KMZWIsolation is run by a Japanese man. He has 1.3 million followers and about 16.6 million likes.
The unique thing about this account is that the user recreates games in the real world. For example, he would take a scene out of GTA V and explore how it works in the real world.
6. DKOldies
DKOldies is an online video game store. It will definitely appeal to you if you are a little older as it has a unique way of discussing video games in a nostalgic manner.
Figure 7: “Game Boy on the N64?” Video by DKOldies
Although the follower count of 630.6k doesn’t show it, this account has a lot of traffic. The proof of this is the 12 million likes.
7. Superlouis_64
Another good Tiktok gaming account is Superlouis_64 . This account embodies the tech side of Tiktok. The user uses different hardware such as swords or other items. He modifies them and does unbelievable feats with them.
The best part is that his content fits into the short video limit that Tiktok has.
8. Cozy.games
Cozy.games is another type of gaming account. It is not your run-of-the-mill account; it is pretty chill. It offers you warm and cozy game feels for you.
Figure 9: Ergonofis Desk Chair Review
If you’re looking for such a cozy environment in your gaming space, then this is the account you must follow. The user provides amazing aesthetics for your setup and also offers recommendations for chill games that you can play to escape the craziness of the world.
9. Roblox
How can we forget Roblox when talking about gaming? It is an amazing platform for users to interact with other developers. And obviously, such a platform must have a Tiktok account.
Roblox’s official Tiktok account has 7.8 million followers and 3.3 million likes. It is the place where people come together to play, create, and socialize.
10. Typical Gamer
Andre Rebelo, AKA TypicalGamer , is a Canadian gaming Youtuber known for his live streams of Fortnite. Having switched platforms in order to make short comedic skits and gaming challenges on TikTok, Typical Gaming is enjoying a relatively successful channel growth and audience engagement.
Figure 10: 2 Favorite Fortnite Moments
With his official gaming account numbering over 6.7 million likes and 1.6 million followers, Typical Gamer is your go-to getaway for enjoying quality gaming content that includes Fortnite, GTA, Spiderman, and many more.
Conclusion
Tiktok is an all-in-one platform that has everything to offer to its users. Gaming is pretty common, and gamers require different platforms to further their interests.
So, as with other interests, Tiktokers also provide a great opportunity to the gamer community with its different accounts. You can learn a little bit about everything from these accounts.
So go and start following these amazing accounts.
Sonic Sieve: Extracting Pure Audio in Audacity
The most frequent request you’ll get from video makers is to eliminate irritating noises like rumbling or humming from an original clip. Almost all of the time, capturing high-quality audio during filming is challenging since the conversation is often hard to hear or is made unclear due to surrounding noises, such as the dreadful air conditioners or fans.
To get rid of all these awful noises, this Audacity Noise Reduction feature will serve you a significant purpose in removing unwanted background noise for your future videos. Without further ado, let’s get started!
In this article
01 Things You Need to Prepare for Background Noise Reduction
02 How to Remove Background Noise in Audacity?
03 Why is Audacity Noise Reduction Not Working?
04 How to Prevent Background Noise in Audio Recording?
05 How to Remove Background Noise in Filmora?
Part 1: Things You Need to Prepare for Background Noise Reduction
Here are few things that you need to consider before you apply the noise reduction to your clips:
1. Noise Sample
A decent sample of the noise you wish to eliminate is perhaps the most crucial aspect of the Audacity remove noise procedure.
This will be used by Audacity to understand the noise and build a noise profile. The noise recording should last for a fair amount of time and be devoid of any other noises.
2. Avoid Copy Pasting Tiny Noise Section in Your Spoken Phrases
When you have a tiny part of noise between your stated words on your audio, please don’t copy/paste it to make a more significant piece of sound for Audacity to examine.
You would not be supplying Audacity with any more information that will help it generate a decent noise profile. The noise profile is what enables Audacity to tell the difference between speech and noise.
3. Minimum 2048 Data Samples Required
To build a noise profile, the Noise Reduction function requires a minimum of 2048 sample data. An audio file with a sampling frequency of 44.1kHz is roughly five hundredths of a second.
Note that this is the minor sound level that Audacity needs to generate a noise profile; however, should you supply a larger sample of the noise, Audacity can typically perform a great job of producing a suitable noise profile. As a result, attempt to capture a few seconds of background noises wherever possible.
4. Establish Recording Level and Record “Silence”
Setting your audio volume and capturing some “quiet” prior to speaking is the best way to achieve this. Instead, when you’ve finished talking, keep your camera/recorder going for a few moments.
Don’t move or create any sounds while capturing the background noises, and keep an ear open for any other noises. You only need to capture the ambient noise for a few moments; two to five seconds will suffice.
Part 2: How to Remove Background Noise in Audacity on Windows and Mac?
Whether you are using Windows or macOS, we will show you a step-by-step process to achieve your results using both software in this part of Audacity remove background music guide.
Remove background noise in Audacity on Windows
Step 1: On your recording, select a few moments of sound. Any segment of noise that incorporates other noises should be avoided.

Step 2: From the Effect menu, select Noise Reduction.

Step 3: Select the Get Noise Profile option whenever the Noise Reduction effect screen appears.

Note: Choose whether to implement the noise removal to the entire waveforms or only a portion of it.
Step 4: To access the Noise Reduction effects window, go to Effects > Noise Reduction. Raise the level of noise reduction progressively while previewing the result.

Step 5: Head over to the File section to Export and Save the result. Audacity does not save sound clips when you select Save Project; instead, you must choose Export. Select the file type you want to store and the place wherever you can save it. Select Save after giving the File Name.

Remove background noise in Audacity on Mac
Step 1: Create a room tone-containing audio file. When you don’t have a separate track for room tone, use a recording with a few moments of quiet in it. Click-and-drag to select a segment with a few minutes of silence using the Selection Tool.

Step 2: Select Noise Reduction from the Effects tab. Select the Get Noise Profile tab in the new tab under Step 1. The screen will shut, and Audacity will take noise profile samples of the indicated area.

Step 3: Click-and-drag to select the whole file, which requires noise reduction with the Selection Tool. To re-open the function, go to the Effect tab and pick Noise Reduction. Make modifications to the following parameters under Step 2:
- Reduce and Residue
- Frequency Smoothing (bands)
- Sensitivity
- Noise Reduction

Step 4: To listen to how the chosen file will look with the selected parameters, select Preview. Re-adjust until you have a sound noise reduction with no interference. When you’re finished, select Reduce and click OK.
Part 3: Why is Audacity Noise Reduction Not Working?
It’s possible that the Noise Reduction function isn’t letting you mop up your recording since your audio isn’t appropriate for it. The disturbance must be continuous, not random or fluctuating, to work for Audacity’s Noise Reduction function.
For example, the Noise Reduction function will not assist if your audio was made in a busy environment with unique noises such as background chatter, random traffic noises, or in an exhibition space or museum. The Noise Reduction feature in Audacity isn’t meant to cope with that kind of distortion. You’ll need to alter your recording approach if you’re capturing voice in either of those situations.
Under the following situations, the Audacity Noise Reduction function might underperform.
- Particular noise in the background, including traffic or people.
- When the harmonics of the sound and voice are comparable.
- There is sound variance where there is fluctuation in the noise.
- The volume of the voice is comparable to or lower than that of the background noise.
- When the noise is irregular or changeable rather than continuous.
- The loudness is deafening.
- The sound is a single click or pop.
Part 4: How to Prevent Background Noise in Audio Recording?
Although Audacity allows eliminating noise very simply, it is still an additional level that takes time to refine your podcast production. These pointers can help you avoid the necessity for noise reduction and cut down on the amount of time you spend processing.
1. Reduce the Computer Fan Noise
Whenever computers become too heated, they can produce a lot of noise. You may limit the amount of software that runs and position your mic away from the keyboard to help lessen this impact and avoid the fan from coming on.
However, even if you observe all of these guidelines, undesired recording sounds may still appear in your program. Fortunately, contemporary software makes this problem quite simple to resolve.
2. Reduce the Gain and Get Close to the Mic
Reduce the gain (sensitivity of the microphone) and go nearer to it. Talking straight into the microphone won’t distort your audio if you reduce the gain, and that would assist your microphone in concentrating on scooping up your voice’s tone.
Bonus Tip: Set your recorder’s (or DAW’s) sensitivity such that your speech peaks between -12 and -10db.
3. Utilize a Versatile Microphone
Condenser and dynamic microphones are the two most common types of podcast microphones. Condenser microphones are significantly more sensitive instruments meant to take up average atmospheric noise, whereas dynamic microphones have a narrower frequency range, picking up fewer ambient noises.
4. Optimize Your Recording Environment
The most significant and most crucial aspect of your podcasts’ sound quality is where you capture it. To optimize your personal podcasting space, we recommend choosing a peaceful, compact area away from HVAC systems, vehicles, external hard drives, background sound, motors, and other distractions. You may also increase the tone of your room by using natural sound absorbents such as curtains, rugs, carpets, and sofas.
Part 5: How to Remove Background Noise in Filmora?
Although there is a lot of software available to eliminate ambient noise, we highly suggest Wondershare Filmora Video Editor to edit audio and video in one place.
In addition to the standard audio editing capabilities, the recently redesigned Filmora currently includes enhanced waveforms, volume Keyframing , peak metering, and audio transitions, giving you a better audio editing interface.
For Win 7 or later (64-bit)
For macOS 10.12 or later
Filmora Video Editor will quickly remove ambient sound from both sound/video. You may also remove the sound from the video with this simple video editor, use the Audio Equalizer or Audio Mixer functions to modify the audio further, and then Export and save the audio in an Mp3 file. Here are the detailed steps:
Step 1: In the Wondershare Filmora Timeline menu, Import your footage. Trim the footage after previewing it and deleting the sections you don’t want to retain.

Step 2: To eliminate the ambient noise immediately, double-click on the video file, and go to the Audio panel to select the Remove Background Noise option. You will find that the background noise is removed automatically.

Step 3: After checking the results, select Export to download the noise-reduced clip to your desktop or upload it immediately to YouTube or Vimeo.

Conclusion
Well, there you have it. In this Audacity Remove Background Noise guide, we have reviewed every possible method you can adopt to get rid of the unnecessary background noise in the Audacity. And if the desired results are still not achieved, we highly recommend using the Wondershare Filmora editing software. Not only will it help you remove the unwanted ambient noise, but it will also allow you to customize your audio or video file further.
02 How to Remove Background Noise in Audacity?
03 Why is Audacity Noise Reduction Not Working?
04 How to Prevent Background Noise in Audio Recording?
05 How to Remove Background Noise in Filmora?
Part 1: Things You Need to Prepare for Background Noise Reduction
Here are few things that you need to consider before you apply the noise reduction to your clips:
1. Noise Sample
A decent sample of the noise you wish to eliminate is perhaps the most crucial aspect of the Audacity remove noise procedure.
This will be used by Audacity to understand the noise and build a noise profile. The noise recording should last for a fair amount of time and be devoid of any other noises.
2. Avoid Copy Pasting Tiny Noise Section in Your Spoken Phrases
When you have a tiny part of noise between your stated words on your audio, please don’t copy/paste it to make a more significant piece of sound for Audacity to examine.
You would not be supplying Audacity with any more information that will help it generate a decent noise profile. The noise profile is what enables Audacity to tell the difference between speech and noise.
3. Minimum 2048 Data Samples Required
To build a noise profile, the Noise Reduction function requires a minimum of 2048 sample data. An audio file with a sampling frequency of 44.1kHz is roughly five hundredths of a second.
Note that this is the minor sound level that Audacity needs to generate a noise profile; however, should you supply a larger sample of the noise, Audacity can typically perform a great job of producing a suitable noise profile. As a result, attempt to capture a few seconds of background noises wherever possible.
4. Establish Recording Level and Record “Silence”
Setting your audio volume and capturing some “quiet” prior to speaking is the best way to achieve this. Instead, when you’ve finished talking, keep your camera/recorder going for a few moments.
Don’t move or create any sounds while capturing the background noises, and keep an ear open for any other noises. You only need to capture the ambient noise for a few moments; two to five seconds will suffice.
Part 2: How to Remove Background Noise in Audacity on Windows and Mac?
Whether you are using Windows or macOS, we will show you a step-by-step process to achieve your results using both software in this part of Audacity remove background music guide.
Remove background noise in Audacity on Windows
Step 1: On your recording, select a few moments of sound. Any segment of noise that incorporates other noises should be avoided.
Step 2: From the Effect menu, select Noise Reduction.
Step 3: Select the Get Noise Profile option whenever the Noise Reduction effect screen appears.
Note: Choose whether to implement the noise removal to the entire waveforms or only a portion of it.
Step 4: To access the Noise Reduction effects window, go to Effects > Noise Reduction. Raise the level of noise reduction progressively while previewing the result.
Step 5: Head over to the File section to Export and Save the result. Audacity does not save sound clips when you select Save Project; instead, you must choose Export. Select the file type you want to store and the place wherever you can save it. Select Save after giving the File Name.
Remove background noise in Audacity on Mac
Step 1: Create a room tone-containing audio file. When you don’t have a separate track for room tone, use a recording with a few moments of quiet in it. Click-and-drag to select a segment with a few minutes of silence using the Selection Tool.
Step 2: Select Noise Reduction from the Effects tab. Select the Get Noise Profile tab in the new tab under Step 1. The screen will shut, and Audacity will take noise profile samples of the indicated area.
Step 3: Click-and-drag to select the whole file, which requires noise reduction with the Selection Tool. To re-open the function, go to the Effect tab and pick Noise Reduction. Make modifications to the following parameters under Step 2:
- Reduce and Residue
- Frequency Smoothing (bands)
- Sensitivity
- Noise Reduction
Step 4: To listen to how the chosen file will look with the selected parameters, select Preview. Re-adjust until you have a sound noise reduction with no interference. When you’re finished, select Reduce and click OK.
Part 3: Why is Audacity Noise Reduction Not Working?
It’s possible that the Noise Reduction function isn’t letting you mop up your recording since your audio isn’t appropriate for it. The disturbance must be continuous, not random or fluctuating, to work for Audacity’s Noise Reduction function.
For example, the Noise Reduction function will not assist if your audio was made in a busy environment with unique noises such as background chatter, random traffic noises, or in an exhibition space or museum. The Noise Reduction feature in Audacity isn’t meant to cope with that kind of distortion. You’ll need to alter your recording approach if you’re capturing voice in either of those situations.
Under the following situations, the Audacity Noise Reduction function might underperform.
- Particular noise in the background, including traffic or people.
- When the harmonics of the sound and voice are comparable.
- There is sound variance where there is fluctuation in the noise.
- The volume of the voice is comparable to or lower than that of the background noise.
- When the noise is irregular or changeable rather than continuous.
- The loudness is deafening.
- The sound is a single click or pop.
Part 4: How to Prevent Background Noise in Audio Recording?
Although Audacity allows eliminating noise very simply, it is still an additional level that takes time to refine your podcast production. These pointers can help you avoid the necessity for noise reduction and cut down on the amount of time you spend processing.
1. Reduce the Computer Fan Noise
Whenever computers become too heated, they can produce a lot of noise. You may limit the amount of software that runs and position your mic away from the keyboard to help lessen this impact and avoid the fan from coming on.
However, even if you observe all of these guidelines, undesired recording sounds may still appear in your program. Fortunately, contemporary software makes this problem quite simple to resolve.
2. Reduce the Gain and Get Close to the Mic
Reduce the gain (sensitivity of the microphone) and go nearer to it. Talking straight into the microphone won’t distort your audio if you reduce the gain, and that would assist your microphone in concentrating on scooping up your voice’s tone.
Bonus Tip: Set your recorder’s (or DAW’s) sensitivity such that your speech peaks between -12 and -10db.
3. Utilize a Versatile Microphone
Condenser and dynamic microphones are the two most common types of podcast microphones. Condenser microphones are significantly more sensitive instruments meant to take up average atmospheric noise, whereas dynamic microphones have a narrower frequency range, picking up fewer ambient noises.
4. Optimize Your Recording Environment
The most significant and most crucial aspect of your podcasts’ sound quality is where you capture it. To optimize your personal podcasting space, we recommend choosing a peaceful, compact area away from HVAC systems, vehicles, external hard drives, background sound, motors, and other distractions. You may also increase the tone of your room by using natural sound absorbents such as curtains, rugs, carpets, and sofas.
Part 5: How to Remove Background Noise in Filmora?
Although there is a lot of software available to eliminate ambient noise, we highly suggest Wondershare Filmora Video Editor to edit audio and video in one place.
In addition to the standard audio editing capabilities, the recently redesigned Filmora currently includes enhanced waveforms, volume Keyframing , peak metering, and audio transitions, giving you a better audio editing interface.
For Win 7 or later (64-bit)
For macOS 10.12 or later
Filmora Video Editor will quickly remove ambient sound from both sound/video. You may also remove the sound from the video with this simple video editor, use the Audio Equalizer or Audio Mixer functions to modify the audio further, and then Export and save the audio in an Mp3 file. Here are the detailed steps:
Step 1: In the Wondershare Filmora Timeline menu, Import your footage. Trim the footage after previewing it and deleting the sections you don’t want to retain.
Step 2: To eliminate the ambient noise immediately, double-click on the video file, and go to the Audio panel to select the Remove Background Noise option. You will find that the background noise is removed automatically.
Step 3: After checking the results, select Export to download the noise-reduced clip to your desktop or upload it immediately to YouTube or Vimeo.
Conclusion
Well, there you have it. In this Audacity Remove Background Noise guide, we have reviewed every possible method you can adopt to get rid of the unnecessary background noise in the Audacity. And if the desired results are still not achieved, we highly recommend using the Wondershare Filmora editing software. Not only will it help you remove the unwanted ambient noise, but it will also allow you to customize your audio or video file further.
Also read:
- [New] 2024 Approved Jester's Journal Exploring New Stars on TikTok
- [New] Invite and Guest at TikTok Lives Easily
- [Updated] In 2024, The Ultimate Guide to Incorporating Siri Commands in TikTok Videos
- [New] Ultimate Selection of Leading TikTok GIF Converter Tools
- [Updated] Easy Video Upload on TikTok with Your Personal MAC/PC Device for 2024
- 2024 Approved Boost Your Content 20 Premium TikTok Caption Strategies
- [New] In 2024, From Silence to Sound A Guide to TikTok Voiceover
- [New] 2024 Approved Master the Art of Going Viral TikTok Insider Hits
- [New] 2024 Approved How to Create Successful Tiktok Videos on Desktop/Android/iPhone?
- Likee Vs. Tiktok Will Likee Surpass TikTok?
- [New] In 2024, 9 Must-Know Techniques for Enhancing Your TikTok Following
- [New] Accelerate Your Library Quick TikTok Download Strategies
- [Updated] Trustful Growth How to Properly Buy TikTok Followers
- [Updated] In 2024, Mastering the Placement of Text in TikTok Video Formats
- From Novice to Pro Using Templates for Stellar TikTok Videos for 2024
- [New] TikTok Photo Editing Hack How to Ace the Viral Hacks Easily for 2024
- Fast-Track Your TikTok Video Creation Process for 2024
- 2024 Approved The Insider's Secret to Viral TikTok Edits
- [New] Mastering Personal Branding on TikTok A Detailed Guide
- In 2024, Immediate Harmony Views on Xigua Video
- [New] 2024 Approved Anime Emojis & Animations Sprucing Up Your TikTok Videos
- [Updated] Unlocking Creative Potential on TikTok Through Voiceovers
- [Updated] In 2024, Mastering Video-to-GIF Conversion Top 5 Software Insights
- Cutting-Edge TikTok Live Broadcast Techniques on Computer for 2024
- Revealing the Best Gamers in Today's TikTok World for 2024
- [New] Effortless TikTok to MP4 File Transformation for 2024
- [New] 2024 Approved How to Regain Visibility on a TikTok Ban List
- [New] Harnessing the Power of Speech on TikTok Platform
- [New] 2024 Approved Mastering Virality on TikTok Essential Hits
- [New] In 2024, Unraveling 15 Trendy TikTok Stunts Today
- 2024 Approved Unlock TikTok's Potential with Simple Bio Tweaks
- [Updated] Boosting Brand with TikTok Promotion A Growth Blueprint for 2024
- [Updated] 2023 | How to Check Tiktok Video Copyright Before Uploading for 2024
- [Updated] In 2024, Immediate Dance Broadcasts on ROKTV
- [New] In 2024, Refreshing Mistake on TikTok – What Happens?
- [Updated] 5 Must-Do Things Before TikTok Usage on macOS for 2024
- [New] Hot TikTok Shopping 30 Essential Products From Amazon for 2024
- A Tech-Savvy Approach Securely Storing Snapchat Photos on Devices
- [Updated] 2024 Approved Explore Amazing TikTok-Inspired Finds on Amazon
- [Updated] In 2024, Master Your TikTok Vibe - Explore Top 7 Emojis + Elusive Signals
- From Ordinary Snaps to Captivating Creations Editing on Snapchat
- [Updated] In 2024, Unlocking Your Custom TikTok Identifier Key
- [Updated] Boosting Video Success Tips From Top 50+ Quotes on TikTok for 2024
- Elevate Your Vision Integrating High-Quality Voiceover Into Videos
- [Updated] Convert TikTok to MP4 [No Watermark] Top TikTok Downloaders for 2024
- [Updated] 2024 Approved Add Context and Meaning with Strategic Text Overlays on TikTok Videos
- Majority of Top TikTok Money-Predicting Apps for 2024
- [Updated] Enhance Visibility on TikTok - A List of Powerful Username Concepts
- In 2024, Still Using Pattern Locks with Vivo Y100A? Tips, Tricks and Helpful Advice
- Ultimate Guide from Samsung Galaxy A34 5G FRP Bypass
- How to Unlock a Network Locked Xiaomi 14 Ultra Phone?
- 2024 Approved The Ultimate List of Free Haunting Noise Archives
- [Updated] Discover Unmissable Adventures in Sandbox Gaming for 2024
- [New] How to Record Screen and Video on Android?
- Updated In 2024, Best Applications That Can Help Apply The Best VHS Camera Effect
- Begin the Stream An Introduction to Instagram Lives for 2024
- [Updated] Auditory Data Extraction & Analysis for 2024
- In 2024, Where Is the Best Place to Catch Dratini On Oppo F25 Pro 5G | Dr.fone
- 11 Proven Solutions to Fix Google Play Store Not Working Issue on Itel P55+ | Dr.fone
- [New] In 2024, Harmony Haven Gather, Download & Dissect Audio
- In 2024, Ultimate Guide to Catch the Regional-Located Pokemon For Oppo Reno 11 Pro 5G | Dr.fone
- In 2024, The Ultimate Guide to Oppo Find N3 Flip Pattern Lock Screen Everything You Need to Know
- In 2024, How Do I SIM Unlock My iPhone X?
- In 2024, How to Hide/Fake Snapchat Location on Your Realme Note 50 | Dr.fone
- [Updated] In 2024, Trending Vids The #VideoViral Phenomenon
- In 2024, Is GSM Flasher ADB Legit? Full Review To Bypass Your Oppo A78 5G Phone FRP Lock
- 2024 Approved Unlock Free Images for Your Business A Beginners Guide
- [Updated] Picture-Perfect Instagram Carousel
- New In 2024, Add Stylish Text to Videos
- New In 2024, Musical Vignettes Infusing Life Into Your Cinematic Creations with Filmora
- How to Repair Broken video files of Vivo X90S on Windows??
- Updated The Ultimate Guide to Editing GoPro Footage on Mac (2023 Edition)
- New 2024 Approved Top-Rated Free Online Invitation Video Editors and Makers
- In 2024, Here are Some Pro Tips for Pokemon Go PvP Battles On Nubia Red Magic 8S Pro+ | Dr.fone
- New In 2024, Best Ways to Add Photos to Tik Tok Video
- Updated 2024 Approved Essential Mac-Friendly Audio Mixers The Ultimate List of the Best 5
- Discovering the Most Shared TwitVideos of the Year
- New In 2024, Unleash the Power of MP4 to MP3 Conversion on Your Mobile
- Valhalla's Fury Gods of War Converge for 2024
- Updated Coqui Voice Cloning The Ultimate Solution to Streamline Audio Content for 2024
- Compilation of the Best 8 Rain Styled Sounds for Digital Acquisition - Updated for 2024
- What is the best Pokemon for pokemon pvp ranking On Samsung Galaxy M14 4G? | Dr.fone
- 4 Most-Known Ways to Find Someone on Tinder For Apple iPhone 13 Pro Max by Name | Dr.fone
- [Updated] Mastering the Art of PowerPoint Presentation Video Documentation for 2024
- In 2024, A How-To Guide on Bypassing the Apple iPhone 7 iCloud Lock
- Recover your messages after Sony Xperia 1 V has been deleted
- In 2024, A Quick Guide to Nubia Red Magic 8S Pro+ FRP Bypass Instantly
- 2024 Approved Navigating Copyright Laws When Turning Social Media Videos Into GIFS for Educational Purposes
- New In 2024, Free Drone LUTs For Perfect Drone Footage
- [New] Best Mac Options to Replace Bandicam
- Masterful Window Capturer - Win11 Edition for 2024
- In 2024, Forgotten The Voicemail Password Of Nokia C22? Try These Fixes
- Title: [New] Leading Lights in the World of Game TikToks
- Author: Kenneth
- Created at : 2024-05-23 01:24:36
- Updated at : 2024-05-24 01:24:36
- Link: https://tiktok-video-files.techidaily.com/new-leading-lights-in-the-world-of-game-tiktoks/
- License: This work is licensed under CC BY-NC-SA 4.0.
