
!["[New] Echo Elimination Refining Recordings with Audacity for 2024"](https://www.lifewire.com/thmb/Rxuom5OPF41j5xqrR7JQ4w_KqNQ=/400x300/filters:no_upscale():max_bytes(150000):strip_icc()/GettyImages-1166819311-aec86039d8d8469bbb3e155aed81c924.jpg)
"[New] Echo Elimination Refining Recordings with Audacity for 2024"
Echo Elimination: Refining Recordings with Audacity
The most frequent request you’ll get from video makers is to eliminate irritating noises like rumbling or humming from an original clip. Almost all of the time, capturing high-quality audio during filming is challenging since the conversation is often hard to hear or is made unclear due to surrounding noises, such as the dreadful air conditioners or fans.
To get rid of all these awful noises, this Audacity Noise Reduction feature will serve you a significant purpose in removing unwanted background noise for your future videos. Without further ado, let’s get started!
In this article
01 Things You Need to Prepare for Background Noise Reduction
02 How to Remove Background Noise in Audacity?
03 Why is Audacity Noise Reduction Not Working?
04 How to Prevent Background Noise in Audio Recording?
05 How to Remove Background Noise in Filmora?
Part 1: Things You Need to Prepare for Background Noise Reduction
Here are few things that you need to consider before you apply the noise reduction to your clips:
1. Noise Sample
A decent sample of the noise you wish to eliminate is perhaps the most crucial aspect of the Audacity remove noise procedure.
This will be used by Audacity to understand the noise and build a noise profile. The noise recording should last for a fair amount of time and be devoid of any other noises.
2. Avoid Copy Pasting Tiny Noise Section in Your Spoken Phrases
When you have a tiny part of noise between your stated words on your audio, please don’t copy/paste it to make a more significant piece of sound for Audacity to examine.
You would not be supplying Audacity with any more information that will help it generate a decent noise profile. The noise profile is what enables Audacity to tell the difference between speech and noise.
3. Minimum 2048 Data Samples Required
To build a noise profile, the Noise Reduction function requires a minimum of 2048 sample data. An audio file with a sampling frequency of 44.1kHz is roughly five hundredths of a second.
Note that this is the minor sound level that Audacity needs to generate a noise profile; however, should you supply a larger sample of the noise, Audacity can typically perform a great job of producing a suitable noise profile. As a result, attempt to capture a few seconds of background noises wherever possible.
4. Establish Recording Level and Record “Silence”
Setting your audio volume and capturing some “quiet” prior to speaking is the best way to achieve this. Instead, when you’ve finished talking, keep your camera/recorder going for a few moments.
Don’t move or create any sounds while capturing the background noises, and keep an ear open for any other noises. You only need to capture the ambient noise for a few moments; two to five seconds will suffice.
Part 2: How to Remove Background Noise in Audacity on Windows and Mac?
Whether you are using Windows or macOS, we will show you a step-by-step process to achieve your results using both software in this part of Audacity remove background music guide.
Remove background noise in Audacity on Windows
Step 1: On your recording, select a few moments of sound. Any segment of noise that incorporates other noises should be avoided.

Step 2: From the Effect menu, select Noise Reduction.

Step 3: Select the Get Noise Profile option whenever the Noise Reduction effect screen appears.

Note: Choose whether to implement the noise removal to the entire waveforms or only a portion of it.
Step 4: To access the Noise Reduction effects window, go to Effects > Noise Reduction. Raise the level of noise reduction progressively while previewing the result.

Step 5: Head over to the File section to Export and Save the result. Audacity does not save sound clips when you select Save Project; instead, you must choose Export. Select the file type you want to store and the place wherever you can save it. Select Save after giving the File Name.

Remove background noise in Audacity on Mac
Step 1: Create a room tone-containing audio file. When you don’t have a separate track for room tone, use a recording with a few moments of quiet in it. Click-and-drag to select a segment with a few minutes of silence using the Selection Tool.

Step 2: Select Noise Reduction from the Effects tab. Select the Get Noise Profile tab in the new tab under Step 1. The screen will shut, and Audacity will take noise profile samples of the indicated area.

Step 3: Click-and-drag to select the whole file, which requires noise reduction with the Selection Tool. To re-open the function, go to the Effect tab and pick Noise Reduction. Make modifications to the following parameters under Step 2:
- Reduce and Residue
- Frequency Smoothing (bands)
- Sensitivity
- Noise Reduction

Step 4: To listen to how the chosen file will look with the selected parameters, select Preview. Re-adjust until you have a sound noise reduction with no interference. When you’re finished, select Reduce and click OK.
Part 3: Why is Audacity Noise Reduction Not Working?
It’s possible that the Noise Reduction function isn’t letting you mop up your recording since your audio isn’t appropriate for it. The disturbance must be continuous, not random or fluctuating, to work for Audacity’s Noise Reduction function.
For example, the Noise Reduction function will not assist if your audio was made in a busy environment with unique noises such as background chatter, random traffic noises, or in an exhibition space or museum. The Noise Reduction feature in Audacity isn’t meant to cope with that kind of distortion. You’ll need to alter your recording approach if you’re capturing voice in either of those situations.
Under the following situations, the Audacity Noise Reduction function might underperform.
- Particular noise in the background, including traffic or people.
- When the harmonics of the sound and voice are comparable.
- There is sound variance where there is fluctuation in the noise.
- The volume of the voice is comparable to or lower than that of the background noise.
- When the noise is irregular or changeable rather than continuous.
- The loudness is deafening.
- The sound is a single click or pop.
Part 4: How to Prevent Background Noise in Audio Recording?
Although Audacity allows eliminating noise very simply, it is still an additional level that takes time to refine your podcast production. These pointers can help you avoid the necessity for noise reduction and cut down on the amount of time you spend processing.
1. Reduce the Computer Fan Noise
Whenever computers become too heated, they can produce a lot of noise. You may limit the amount of software that runs and position your mic away from the keyboard to help lessen this impact and avoid the fan from coming on.
However, even if you observe all of these guidelines, undesired recording sounds may still appear in your program. Fortunately, contemporary software makes this problem quite simple to resolve.
2. Reduce the Gain and Get Close to the Mic
Reduce the gain (sensitivity of the microphone) and go nearer to it. Talking straight into the microphone won’t distort your audio if you reduce the gain, and that would assist your microphone in concentrating on scooping up your voice’s tone.
Bonus Tip: Set your recorder’s (or DAW’s) sensitivity such that your speech peaks between -12 and -10db.
3. Utilize a Versatile Microphone
Condenser and dynamic microphones are the two most common types of podcast microphones. Condenser microphones are significantly more sensitive instruments meant to take up average atmospheric noise, whereas dynamic microphones have a narrower frequency range, picking up fewer ambient noises.
4. Optimize Your Recording Environment
The most significant and most crucial aspect of your podcasts’ sound quality is where you capture it. To optimize your personal podcasting space, we recommend choosing a peaceful, compact area away from HVAC systems, vehicles, external hard drives, background sound, motors, and other distractions. You may also increase the tone of your room by using natural sound absorbents such as curtains, rugs, carpets, and sofas.
Part 5: How to Remove Background Noise in Filmora?
Although there is a lot of software available to eliminate ambient noise, we highly suggest Wondershare Filmora Video Editor to edit audio and video in one place.
In addition to the standard audio editing capabilities, the recently redesigned Filmora currently includes enhanced waveforms, volume Keyframing , peak metering, and audio transitions, giving you a better audio editing interface.
For Win 7 or later (64-bit)
For macOS 10.12 or later
Filmora Video Editor will quickly remove ambient sound from both sound/video. You may also remove the sound from the video with this simple video editor, use the Audio Equalizer or Audio Mixer functions to modify the audio further, and then Export and save the audio in an Mp3 file. Here are the detailed steps:
Step 1: In the Wondershare Filmora Timeline menu, Import your footage. Trim the footage after previewing it and deleting the sections you don’t want to retain.

Step 2: To eliminate the ambient noise immediately, double-click on the video file, and go to the Audio panel to select the Remove Background Noise option. You will find that the background noise is removed automatically.

Step 3: After checking the results, select Export to download the noise-reduced clip to your desktop or upload it immediately to YouTube or Vimeo.

Conclusion
Well, there you have it. In this Audacity Remove Background Noise guide, we have reviewed every possible method you can adopt to get rid of the unnecessary background noise in the Audacity. And if the desired results are still not achieved, we highly recommend using the Wondershare Filmora editing software. Not only will it help you remove the unwanted ambient noise, but it will also allow you to customize your audio or video file further.
02 How to Remove Background Noise in Audacity?
03 Why is Audacity Noise Reduction Not Working?
04 How to Prevent Background Noise in Audio Recording?
05 How to Remove Background Noise in Filmora?
Part 1: Things You Need to Prepare for Background Noise Reduction
Here are few things that you need to consider before you apply the noise reduction to your clips:
1. Noise Sample
A decent sample of the noise you wish to eliminate is perhaps the most crucial aspect of the Audacity remove noise procedure.
This will be used by Audacity to understand the noise and build a noise profile. The noise recording should last for a fair amount of time and be devoid of any other noises.
2. Avoid Copy Pasting Tiny Noise Section in Your Spoken Phrases
When you have a tiny part of noise between your stated words on your audio, please don’t copy/paste it to make a more significant piece of sound for Audacity to examine.
You would not be supplying Audacity with any more information that will help it generate a decent noise profile. The noise profile is what enables Audacity to tell the difference between speech and noise.
3. Minimum 2048 Data Samples Required
To build a noise profile, the Noise Reduction function requires a minimum of 2048 sample data. An audio file with a sampling frequency of 44.1kHz is roughly five hundredths of a second.
Note that this is the minor sound level that Audacity needs to generate a noise profile; however, should you supply a larger sample of the noise, Audacity can typically perform a great job of producing a suitable noise profile. As a result, attempt to capture a few seconds of background noises wherever possible.
4. Establish Recording Level and Record “Silence”
Setting your audio volume and capturing some “quiet” prior to speaking is the best way to achieve this. Instead, when you’ve finished talking, keep your camera/recorder going for a few moments.
Don’t move or create any sounds while capturing the background noises, and keep an ear open for any other noises. You only need to capture the ambient noise for a few moments; two to five seconds will suffice.
Part 2: How to Remove Background Noise in Audacity on Windows and Mac?
Whether you are using Windows or macOS, we will show you a step-by-step process to achieve your results using both software in this part of Audacity remove background music guide.
Remove background noise in Audacity on Windows
Step 1: On your recording, select a few moments of sound. Any segment of noise that incorporates other noises should be avoided.
Step 2: From the Effect menu, select Noise Reduction.
Step 3: Select the Get Noise Profile option whenever the Noise Reduction effect screen appears.
Note: Choose whether to implement the noise removal to the entire waveforms or only a portion of it.
Step 4: To access the Noise Reduction effects window, go to Effects > Noise Reduction. Raise the level of noise reduction progressively while previewing the result.
Step 5: Head over to the File section to Export and Save the result. Audacity does not save sound clips when you select Save Project; instead, you must choose Export. Select the file type you want to store and the place wherever you can save it. Select Save after giving the File Name.
Remove background noise in Audacity on Mac
Step 1: Create a room tone-containing audio file. When you don’t have a separate track for room tone, use a recording with a few moments of quiet in it. Click-and-drag to select a segment with a few minutes of silence using the Selection Tool.
Step 2: Select Noise Reduction from the Effects tab. Select the Get Noise Profile tab in the new tab under Step 1. The screen will shut, and Audacity will take noise profile samples of the indicated area.
Step 3: Click-and-drag to select the whole file, which requires noise reduction with the Selection Tool. To re-open the function, go to the Effect tab and pick Noise Reduction. Make modifications to the following parameters under Step 2:
- Reduce and Residue
- Frequency Smoothing (bands)
- Sensitivity
- Noise Reduction
Step 4: To listen to how the chosen file will look with the selected parameters, select Preview. Re-adjust until you have a sound noise reduction with no interference. When you’re finished, select Reduce and click OK.
Part 3: Why is Audacity Noise Reduction Not Working?
It’s possible that the Noise Reduction function isn’t letting you mop up your recording since your audio isn’t appropriate for it. The disturbance must be continuous, not random or fluctuating, to work for Audacity’s Noise Reduction function.
For example, the Noise Reduction function will not assist if your audio was made in a busy environment with unique noises such as background chatter, random traffic noises, or in an exhibition space or museum. The Noise Reduction feature in Audacity isn’t meant to cope with that kind of distortion. You’ll need to alter your recording approach if you’re capturing voice in either of those situations.
Under the following situations, the Audacity Noise Reduction function might underperform.
- Particular noise in the background, including traffic or people.
- When the harmonics of the sound and voice are comparable.
- There is sound variance where there is fluctuation in the noise.
- The volume of the voice is comparable to or lower than that of the background noise.
- When the noise is irregular or changeable rather than continuous.
- The loudness is deafening.
- The sound is a single click or pop.
Part 4: How to Prevent Background Noise in Audio Recording?
Although Audacity allows eliminating noise very simply, it is still an additional level that takes time to refine your podcast production. These pointers can help you avoid the necessity for noise reduction and cut down on the amount of time you spend processing.
1. Reduce the Computer Fan Noise
Whenever computers become too heated, they can produce a lot of noise. You may limit the amount of software that runs and position your mic away from the keyboard to help lessen this impact and avoid the fan from coming on.
However, even if you observe all of these guidelines, undesired recording sounds may still appear in your program. Fortunately, contemporary software makes this problem quite simple to resolve.
2. Reduce the Gain and Get Close to the Mic
Reduce the gain (sensitivity of the microphone) and go nearer to it. Talking straight into the microphone won’t distort your audio if you reduce the gain, and that would assist your microphone in concentrating on scooping up your voice’s tone.
Bonus Tip: Set your recorder’s (or DAW’s) sensitivity such that your speech peaks between -12 and -10db.
3. Utilize a Versatile Microphone
Condenser and dynamic microphones are the two most common types of podcast microphones. Condenser microphones are significantly more sensitive instruments meant to take up average atmospheric noise, whereas dynamic microphones have a narrower frequency range, picking up fewer ambient noises.
4. Optimize Your Recording Environment
The most significant and most crucial aspect of your podcasts’ sound quality is where you capture it. To optimize your personal podcasting space, we recommend choosing a peaceful, compact area away from HVAC systems, vehicles, external hard drives, background sound, motors, and other distractions. You may also increase the tone of your room by using natural sound absorbents such as curtains, rugs, carpets, and sofas.
Part 5: How to Remove Background Noise in Filmora?
Although there is a lot of software available to eliminate ambient noise, we highly suggest Wondershare Filmora Video Editor to edit audio and video in one place.
In addition to the standard audio editing capabilities, the recently redesigned Filmora currently includes enhanced waveforms, volume Keyframing , peak metering, and audio transitions, giving you a better audio editing interface.
For Win 7 or later (64-bit)
For macOS 10.12 or later
Filmora Video Editor will quickly remove ambient sound from both sound/video. You may also remove the sound from the video with this simple video editor, use the Audio Equalizer or Audio Mixer functions to modify the audio further, and then Export and save the audio in an Mp3 file. Here are the detailed steps:
Step 1: In the Wondershare Filmora Timeline menu, Import your footage. Trim the footage after previewing it and deleting the sections you don’t want to retain.
Step 2: To eliminate the ambient noise immediately, double-click on the video file, and go to the Audio panel to select the Remove Background Noise option. You will find that the background noise is removed automatically.
Step 3: After checking the results, select Export to download the noise-reduced clip to your desktop or upload it immediately to YouTube or Vimeo.
Conclusion
Well, there you have it. In this Audacity Remove Background Noise guide, we have reviewed every possible method you can adopt to get rid of the unnecessary background noise in the Audacity. And if the desired results are still not achieved, we highly recommend using the Wondershare Filmora editing software. Not only will it help you remove the unwanted ambient noise, but it will also allow you to customize your audio or video file further.
Freely Collect TikTok Masterpieces - No Marks Included
8 Free Online TikTok Video Downloaders -No Watermark Included

Shanoon Cox
Mar 27, 2024• Proven solutions
TikTok captured people’s attention when it launched the unique idea of adding voiceover to any video and it all started with making joke videos with friends and soon it became an internet sensation in no time. Everybody out there was using TikTok, be it an old person or a young boy everyone was trying to figure out their way to make a video that goes viral on TikTok. With that being said, one thing that TikTok is missing is the download option, people want to download the TikTok video so that they can watch it later or share it with their friends. In this article, we are going to tell you about some cool TikTok video downloaders that would help you to download TikTok videos without using the hectic process of TikTok video download apps.
- 8 Free Online TikTok Video Downloaders
- Bonus Tip – Watch TikTok Videos in Reverse Using Wondershare Filmora
8 Free Online TikTok Video Downloaders
In this guide, you will get to know about some TikTok video downloaders that you can use to download TikTok videos online without watermarks and copyrights.
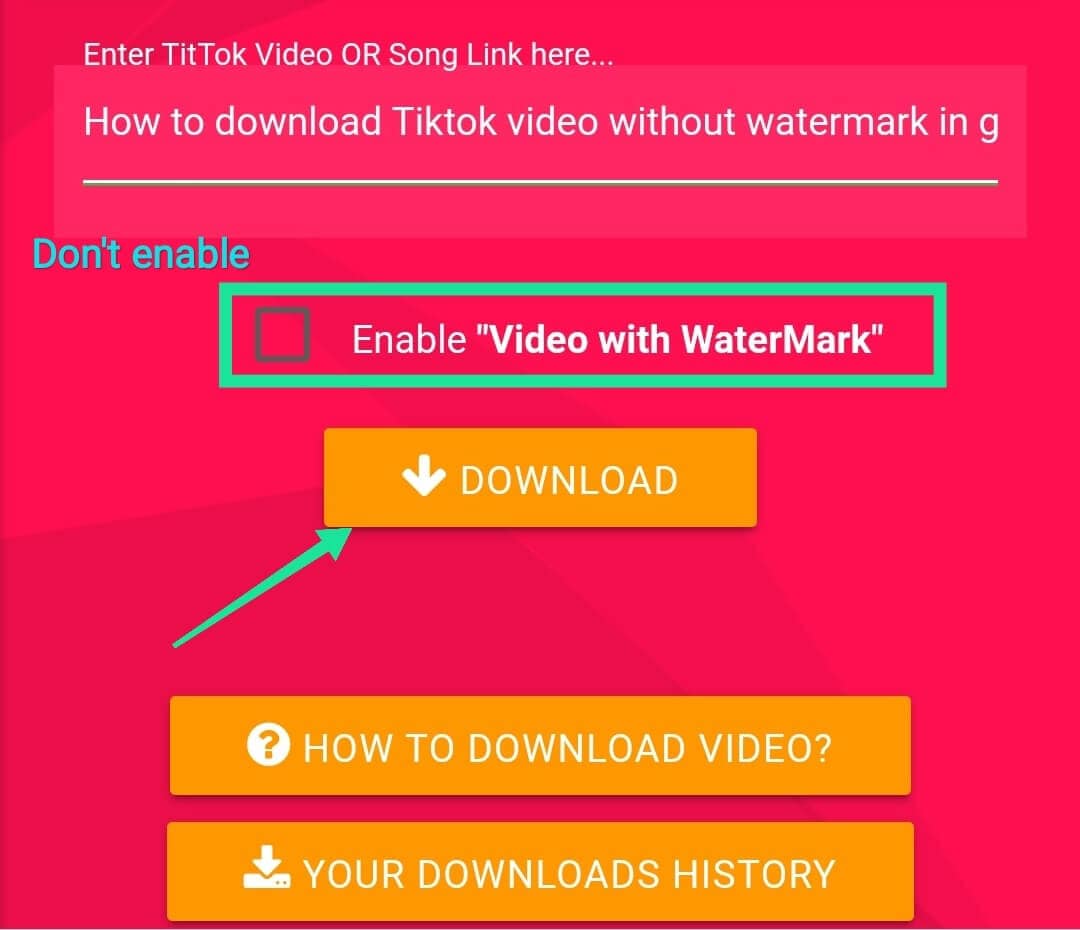
1. SnapTik App
SnapTik app is claimed to be the best TikTok video downloading app without a watermark. The best part about this app is the interface that doesn’t ask you to download any app or put some money in the app to download TikTok videos. All it takes is a browser and the video link that you want to download. Put the video link on the search box and let the app show you the magic with a video without a watermark.

2. MusiclyDown
Musically Down is a free TikTok video downloading app that would download any video on TikTok within seconds? Be it the music or the video it can download everything from TikTok without any watermark. Like the other best apps, it also works on the web app and requires no installation, just browse the website and enter the video link that you want to download, rest the tool will do.
3. SSSTikTok
SSSTikTok is a great app as it’s available on all platforms like browser, Android, and iOS. You can download any TikTok song or video in HD format without any watermark. There is only a task that you might have to do if you are an iOS user, you need to download the Documents by Readle app from the app store and then copy-paste the video link directly from the TikTok app and launch the Readle app. After that, you will see a browser icon in the bottom, click it and it will redirect you to the ssstiktok.io website and here you can paste the link and your video will be downloaded in no time.

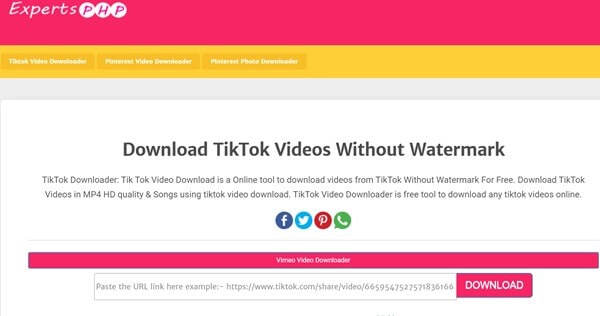
4. ExpertsPHP
ExpertsPHP is an online TikTok video downloader that is compatible with all the browsers and social media platforms. One can not only download TikTok songs and videos but stories and other videos from Facebook, Instagram, Twitter, Vimeo, and like an app. You don’t require to download any app for it, just simply browse the website and paste the video link to get started with your favorite videos.
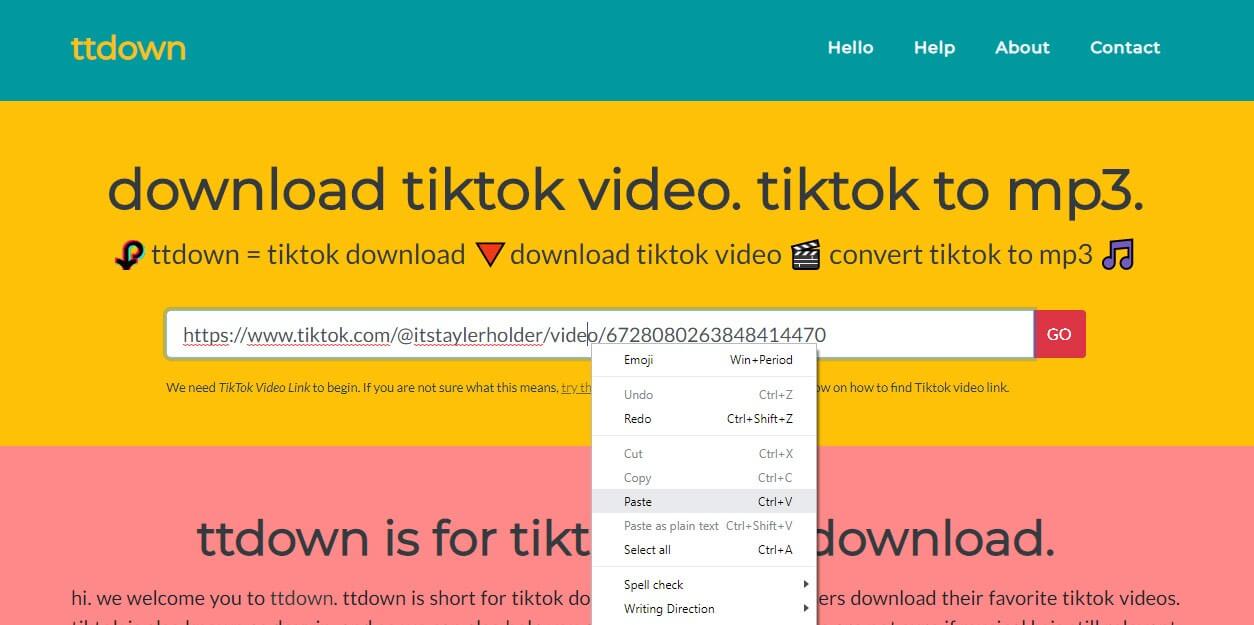
5. TTDownloader
TTdownloader is another web app that can download any TikTok video with just a simple link. You can download TikTok videos without a watermark by only pasting the link on the website and the rest of the website will take care of your videos. The best part about this web app is that it’s simple as making coffee, you just need the correct URL to browse the site, and the rest of everything will be done by the tool itself.
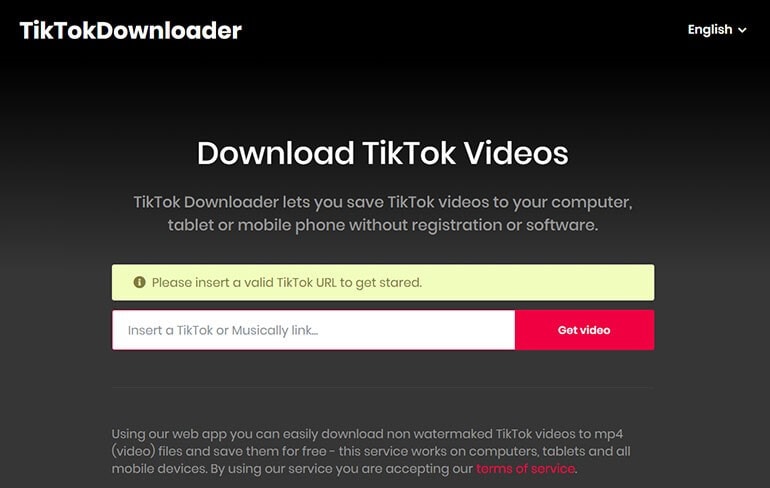
6. Downloaderi
Downloaderi is a great app to download TikTok videos in a high-quality format without a watermark. It doesn’t matter which OS you are using, be it Linux or iOS you just need to have a browser on your device and you can download any TikTok video with just a simple link. The process is the same as the other web apps, simply copy and paste the link on the browser window and let the app do the wonders for you.

7. TTDown
TTDown is a TikTok video downloader with an amazing interface and conversion tools. You can download a video and convert it into any format that is compatible with the tool. Copy the link of your favorite video from the TikTok app and paste it on the browser and the video will be saved on your mobile phone.
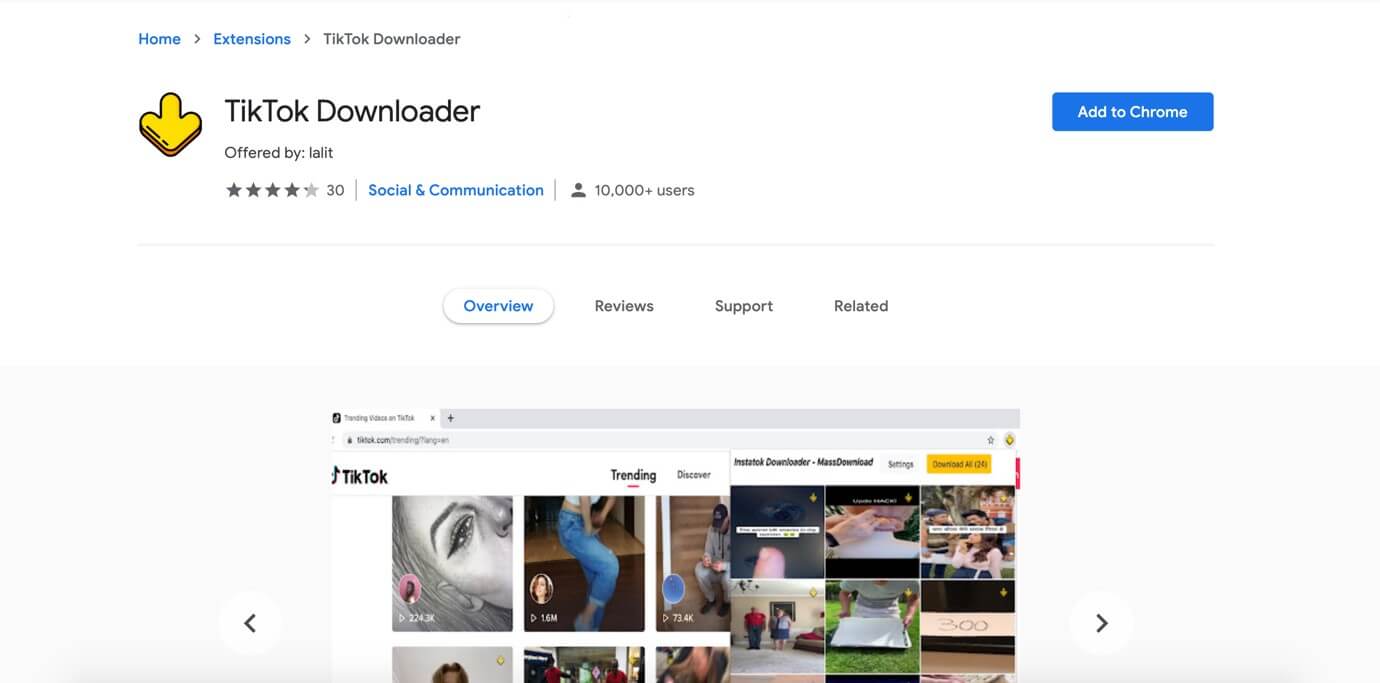
8. TikTok Downloader (Chrome Plugin)
TikTok Downloader is the same as the other video downloaders but it has something different as it’s a chrome extension that would only work if you have chrome installed on your PC. The best part of this extension is that it would show you the option of downloading all the videos at once if you are browsing the TikTok dashboard or profile of any video makers on TikTok. Though there are certain limitations on this tool if you are using a PC to watch and download TikTok videos then this extension is your best friend, in no time you can tons of tik videos if you have high-speed internet.
Bonus Tip – Watch TikTok Videos in Reverse Using Wondershare Filmora
Wondershare Filmora is a renowned video editor in the video editing industry. Its cool features like motion tracking, animation keyframing, color matching, audio ducking, and effects library can not only help you edit your own TikTok videos but also get creative tips to make your TikTok video stand out.


Steps to Watch TikTok Videos in Reverse:
1. Download the TikTok app and save your favorite video on the computer to import it to Filmora’s media library.
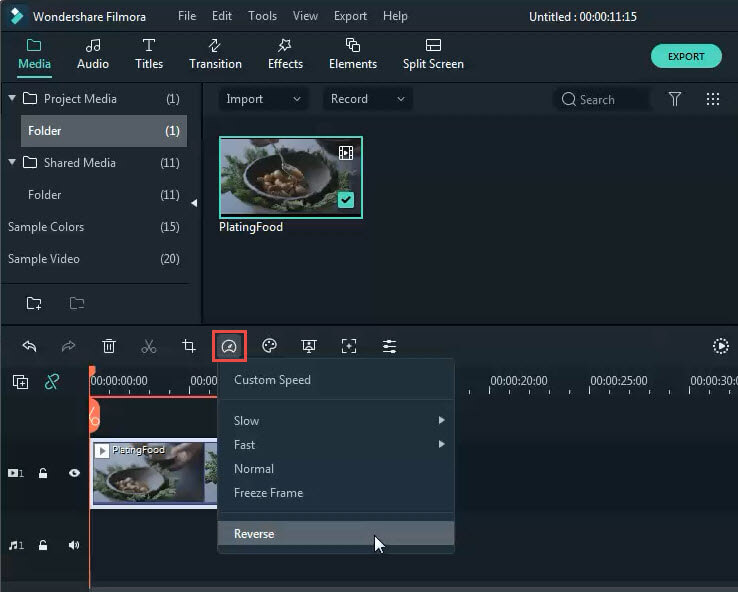
2. Add the video on the timeline and click the Pointer icon to select Reverse.
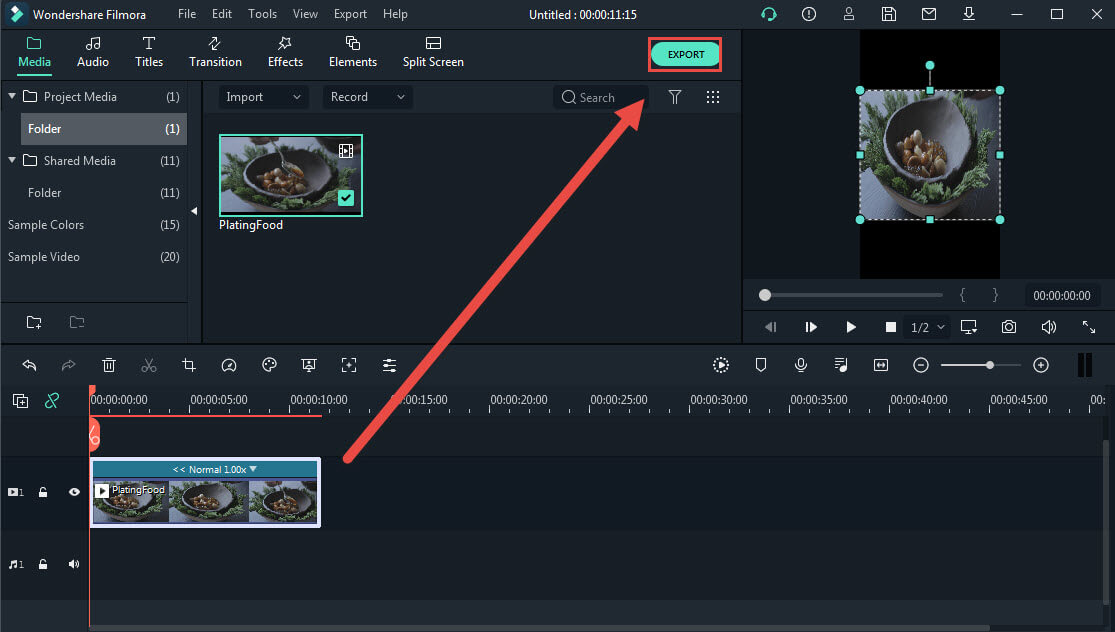
3. Now, your video will be played in reverse motion, and once done, export the video and save it on your computer.
Conclusion
Now, your search for a TikTok video downloader has ended as you have got some of the best free tools to download a TikTok video without a watermark. Sometimes TikTok video download apps are irritating as they demand installations and other logins but the tools and apps listed in this guide are smooth as water and quick as a fox. You should go and check any of these tools and let us know in the comment section about the best part that you liked about that tool.
Shanoon Cox
Shanoon Cox is a writer and a lover of all things video.
Follow @Shanoon Cox
Shanoon Cox
Mar 27, 2024• Proven solutions
TikTok captured people’s attention when it launched the unique idea of adding voiceover to any video and it all started with making joke videos with friends and soon it became an internet sensation in no time. Everybody out there was using TikTok, be it an old person or a young boy everyone was trying to figure out their way to make a video that goes viral on TikTok. With that being said, one thing that TikTok is missing is the download option, people want to download the TikTok video so that they can watch it later or share it with their friends. In this article, we are going to tell you about some cool TikTok video downloaders that would help you to download TikTok videos without using the hectic process of TikTok video download apps.
- 8 Free Online TikTok Video Downloaders
- Bonus Tip – Watch TikTok Videos in Reverse Using Wondershare Filmora
8 Free Online TikTok Video Downloaders
In this guide, you will get to know about some TikTok video downloaders that you can use to download TikTok videos online without watermarks and copyrights.
1. SnapTik App
SnapTik app is claimed to be the best TikTok video downloading app without a watermark. The best part about this app is the interface that doesn’t ask you to download any app or put some money in the app to download TikTok videos. All it takes is a browser and the video link that you want to download. Put the video link on the search box and let the app show you the magic with a video without a watermark.
2. MusiclyDown
Musically Down is a free TikTok video downloading app that would download any video on TikTok within seconds? Be it the music or the video it can download everything from TikTok without any watermark. Like the other best apps, it also works on the web app and requires no installation, just browse the website and enter the video link that you want to download, rest the tool will do.
3. SSSTikTok
SSSTikTok is a great app as it’s available on all platforms like browser, Android, and iOS. You can download any TikTok song or video in HD format without any watermark. There is only a task that you might have to do if you are an iOS user, you need to download the Documents by Readle app from the app store and then copy-paste the video link directly from the TikTok app and launch the Readle app. After that, you will see a browser icon in the bottom, click it and it will redirect you to the ssstiktok.io website and here you can paste the link and your video will be downloaded in no time.
4. ExpertsPHP
ExpertsPHP is an online TikTok video downloader that is compatible with all the browsers and social media platforms. One can not only download TikTok songs and videos but stories and other videos from Facebook, Instagram, Twitter, Vimeo, and like an app. You don’t require to download any app for it, just simply browse the website and paste the video link to get started with your favorite videos.
5. TTDownloader
TTdownloader is another web app that can download any TikTok video with just a simple link. You can download TikTok videos without a watermark by only pasting the link on the website and the rest of the website will take care of your videos. The best part about this web app is that it’s simple as making coffee, you just need the correct URL to browse the site, and the rest of everything will be done by the tool itself.
6. Downloaderi
Downloaderi is a great app to download TikTok videos in a high-quality format without a watermark. It doesn’t matter which OS you are using, be it Linux or iOS you just need to have a browser on your device and you can download any TikTok video with just a simple link. The process is the same as the other web apps, simply copy and paste the link on the browser window and let the app do the wonders for you.
7. TTDown
TTDown is a TikTok video downloader with an amazing interface and conversion tools. You can download a video and convert it into any format that is compatible with the tool. Copy the link of your favorite video from the TikTok app and paste it on the browser and the video will be saved on your mobile phone.
8. TikTok Downloader (Chrome Plugin)
TikTok Downloader is the same as the other video downloaders but it has something different as it’s a chrome extension that would only work if you have chrome installed on your PC. The best part of this extension is that it would show you the option of downloading all the videos at once if you are browsing the TikTok dashboard or profile of any video makers on TikTok. Though there are certain limitations on this tool if you are using a PC to watch and download TikTok videos then this extension is your best friend, in no time you can tons of tik videos if you have high-speed internet.
Bonus Tip – Watch TikTok Videos in Reverse Using Wondershare Filmora
Wondershare Filmora is a renowned video editor in the video editing industry. Its cool features like motion tracking, animation keyframing, color matching, audio ducking, and effects library can not only help you edit your own TikTok videos but also get creative tips to make your TikTok video stand out.
Steps to Watch TikTok Videos in Reverse:
1. Download the TikTok app and save your favorite video on the computer to import it to Filmora’s media library.
2. Add the video on the timeline and click the Pointer icon to select Reverse.
3. Now, your video will be played in reverse motion, and once done, export the video and save it on your computer.
Conclusion
Now, your search for a TikTok video downloader has ended as you have got some of the best free tools to download a TikTok video without a watermark. Sometimes TikTok video download apps are irritating as they demand installations and other logins but the tools and apps listed in this guide are smooth as water and quick as a fox. You should go and check any of these tools and let us know in the comment section about the best part that you liked about that tool.
Shanoon Cox
Shanoon Cox is a writer and a lover of all things video.
Follow @Shanoon Cox
Also read:
- [New] In 2024, Steal TikTok Videos Without Watermarks on Your iPhone Screen
- Navigating TikTok Web A Must-Do List for Mac Users for 2024
- [Updated] 2024 Approved Joke Jamboree on TikTok The Best Hilarious Video Threads for a Laugh
- [Updated] 2024 Approved Mouthwatering Moments 10 Viral Food Trends on TikTok
- [New] Mastering Visual Storytelling Captioning for TikTok Videos
- [Updated] In 2024, Leveraging Likes, Shares, and Comments TikTok's Commerce Magic
- [New] Dominate Your Niche The Ultimate List of TikTok Typography in '23
- [New] 2024 Approved Direct Download Wizardry Turning TikTok to Perfect MP4s
- [New] In 2024, Culinary Craze TikTok’s Food Titans
- [Updated] Top 10 Freely Downloadable Apps for TikTok Video Editing on Mac for 2024
- [Updated] The Game-Changing Impact of TikTok in Modern Business Marketing
- 2024 Approved Eliminate Watermarks IPhone TikTok Videos Download Guide
- Jumpstart Your Journey to TikTok Fame with These Hits for 2024
- [New] Expert Tips for Adding Audio to Your TikTok Creations for 2024
- [New] TikTok's PFP Explained A Complete and Concise Guide
- In 2024, Screwball Skirmishes Uncovering the Funniest TikTok Game Battles
- [Updated] The Edge of Originality Against Popular TikTok Personalities for 2024
- [Updated] 2024 Approved Viral Food Creations Best TikTok Flavors
- Breaking Free Overcoming the Shadowban Phenomenon
- [Updated] Viral Anime-Themed Videos for TikTok Success
- [New] In 2024, Direct Conversion From TikTok Videos to Professional MP4s
- [Updated] In 2024, The Rhythmic Future TikTok's Most Iconic Rap Songs
- 2024 Approved Swift Playback in TikTok Enhancing Performance
- [New] Hasten Through TikTok Content Efficiently
- Affordable Video Editing Solutions (Mac OS) on TikTok
- Expert's Blueprint to Mastering TikTok Icons and Triggers for 2024
- In 2024, Crafting Impactful Content on TikTok with These Best Quotes
- [Updated] Streamline Your TikTok Identity - A User-Friendly Guide for 2024
- [New] Mastering TikTok A Mac User's Quickstart List for 2024
- [Updated] In 2024, Maximizing Your TikTok Content with Advanced Voice Controls via Siri
- [New] Easy and Affordable Video Editing Software (Mac & TikTok)
- Guide to Silentizing Ambient Sounds Use of Audacity's Features for 2024
- [New] Strategies to Circumvent the Hidden Shadowban on TikTok
- [Updated] Top-Rated TikTok Editing Software Compared
- 2024 Approved Twirl, Chill, and Groove The Ultimate Country Playlist on TikTok
- [Updated] 2024 Approved Jujutsu Kaisen Making Waves TikTok Edition
- [Updated] In 2024, Expert Guide to TikTok's Must-Have Elements
- [New] Premium 10 Tools for Crafting TikTok Videos Online (W) for 2024
- [Updated] 2024 Approved Converting TikTok Videos to GIFs Top 5 Software Options
- Elevating Your Content Game with These Top 20 TikTok Captions for 2024
- [New] 2024 Approved Mastering the Art of Creating an Original TikTok Hashtag
- [Updated] Country Grooves for Calmness Top 20 TikTok Anthems
- 2024 Approved Turbo Charge Your TikTok Experience with Fast Forwarding
- [Updated] In 2024, A Countdown of the Most Memorable Animated TikToks
- [New] 2024 Approved Securely Boost Your TikTok Engagement & Reach
- [New] 2024 Approved From Kitchen to Feeds The 10 Hottest TikTok Treats
- Can I Bypass a Forgotten Phone Password Of Lava Yuva 3?
- In 2024, How to Bypass FRP on Samsung Galaxy Z Flip 5?
- How to use Pokemon Go Joystick on Realme C67 5G? | Dr.fone
- How to Loop YouTube Videos on iPhone
- How to Quickly Fix Bluetooth Not Working on Vivo S17 Pro | Dr.fone
- 2024 Approved Saving Reels Made Simple Direct and Indirect Techniques Explained
- Erase Your Online Presence Post-Facebook Stories
- Updated In 2024, Uncovering Plugins That Create Realistic Flatulent Effects for Games and Films
- New MOV Video Rotator Top 5 Free Downloads for 2024
- [New] Maximizing Instagram Accessing Free Filters via Searches for 2024
- Complete guide for recovering messages files on Samsung Galaxy A25 5G
- How to restore wiped videos on Honor Play 7T
- [Updated] Ultimate Unlimited FB Photo/Movie Builder for 2024
- [Updated] Videography Splitter Verdict Top Cam or Not for 2024
- [Updated] 2024 Approved Seamless Backdrop Switches for Google Meet Users
- In 2024, The Ultimate Guide to Unlocking Your iPhone 14 Pro Max on MetroPCS
- In 2024, Unlock Your Device iCloud DNS Bypass Explained and Tested, Plus Easy Alternatives From iPhone 11
- How to Change/Add Location Filters on Snapchat For your Honor Magic V2 | Dr.fone
- How to recover deleted photos from Android Gallery without backup on Nubia
- [Updated] Unpacking Facebook's Freshest Features in Top Vids for 2024
- How to Bypass Activation Lock on Apple iPhone 11 or iPad?
- [New] Securely Shutting Down Your Instagram Presence Forever for 2024
- [New] 2024 Approved WhatsApp Video Integration for Twitter Content
- Android Safe Mode - How to Turn off Safe Mode on Tecno Pop 7 Pro? | Dr.fone
- How To Unlock iPhone 12 Pro Max Without Passcode? 4 Easy Methods
- 2024 Approved Quick & Easy Twitter to Snapchat Video Sharing Tips
- Will iSpoofer update On Samsung Galaxy S23 Ultra | Dr.fone
- [New] Prime Video Conferencing & Communication Aids for 2024
- New 15 Top Montage Music for Different Video Types
- How To Remove Phone Number From Your Apple ID on Your Apple iPhone 6s Plus?
- 5 Quick Methods to Bypass Samsung Galaxy A14 5G FRP
- [New] Top Tickles for Young Game Fans for 2024
- [New] In 2024, Mastering the Art of Backwards Videos on Instagram
- Revolutionize Your Music Experience The Value of Mp3 Converter Articles
- [Updated] In 2024, Direct Viewing Verdict OBS vs ShadowCast
- The Leading Free Platforms for Professional Vocal Enhancement Techniques for 2024
- [Updated] 2024 Approved Superior Download Manager Best YouTube Downloader Apps
- [Updated] 2024 Approved Flawless Gameplay Controlling Games via Switch Pro Controller in Steam
- [Updated] In 2024, Secrets Revealed Skyrocketing Your Insta Video Audience
- [New] Innovative Techniques for Secure & Quality Vimeo Recording for 2024
- In 2024, Easily Unlock Your Itel A60s Device SIM
- [Updated] The Key to Captivating Audiences Crafting FB Slideshows
- [Updated] In 2024, Top 5 Techniques for Capturing Live Sound Over the Web
- Title: "[New] Echo Elimination Refining Recordings with Audacity for 2024"
- Author: Kenneth
- Created at : 2024-05-23 01:43:46
- Updated at : 2024-05-24 01:43:46
- Link: https://tiktok-video-files.techidaily.com/new-echo-elimination-refining-recordings-with-audacity-for-2024/
- License: This work is licensed under CC BY-NC-SA 4.0.
